Halloween: DIY Spell Books

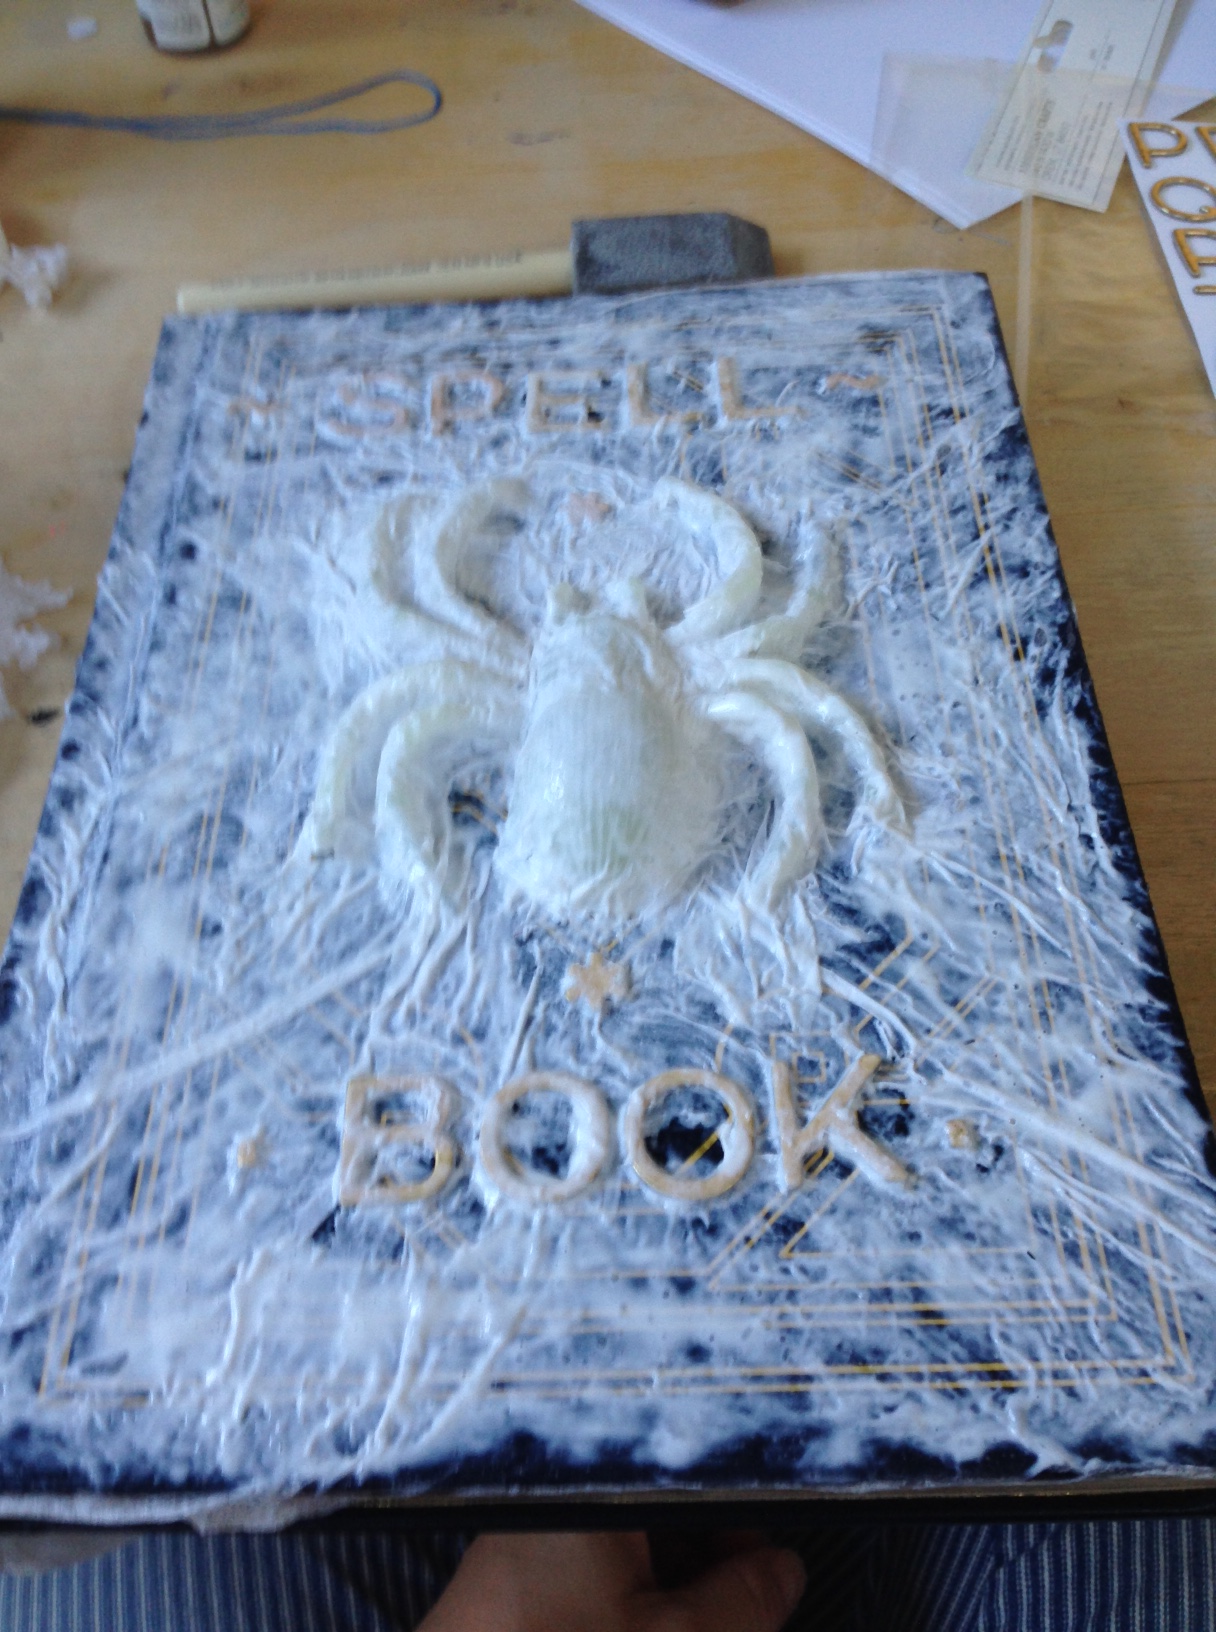
DIY SPELL BOOKS – HARRY POTTER 

DIY Spell Books for Harry Potter Costume

Halloween is maybe the only holiday that can pull me out of my making-stuff-and-writing-about it hiatus. Work, kids, life, blahdy blah blah = time deficit. Time deficit = making things deficit. But then just like that, one little Pinterest success with these spell books, and I’m feeling a need to share. These were an easy-ish, inexpensive project made with my kids to go with their Ron & Hermione – Harry Potter costumes this year. I love how they turned out and will be making more for our Halloween party.

Want to make them yourself? You should! I won’t get too far into the details, simply follow the link to see a step by step, but here are a couple of tips I learned along the way:

  • Old encyclopedias from thrift stores are awesome for this project. The bumps on the spine and the gold detail on the outside covers all add some charm, even when painted over. The inside pages are full of maps, animals, and other encyclopedia style stuff that make it more intriguing.
  • Use gold adhesive lettering from the craft store. When you decoupage over it with the Mod Podge, it still shows through so you don’t need to later paint it to get the metallic look. My kids decides to be very literal and name them “Spell Book” but think of all the possibilities. “Potions & Poisons,” “Hogwarts: History of Spells,” “Deadly Hexes” etc.
  • Have your kids design their own book. They loved coming up with the colors, lettering, and creatures to glue on the front. My daughter added her initials down the spine to make it her own.
  • Next up: I’m going to print out these Harry Potter Spells and glue them onto some of the book’s pages throughout.

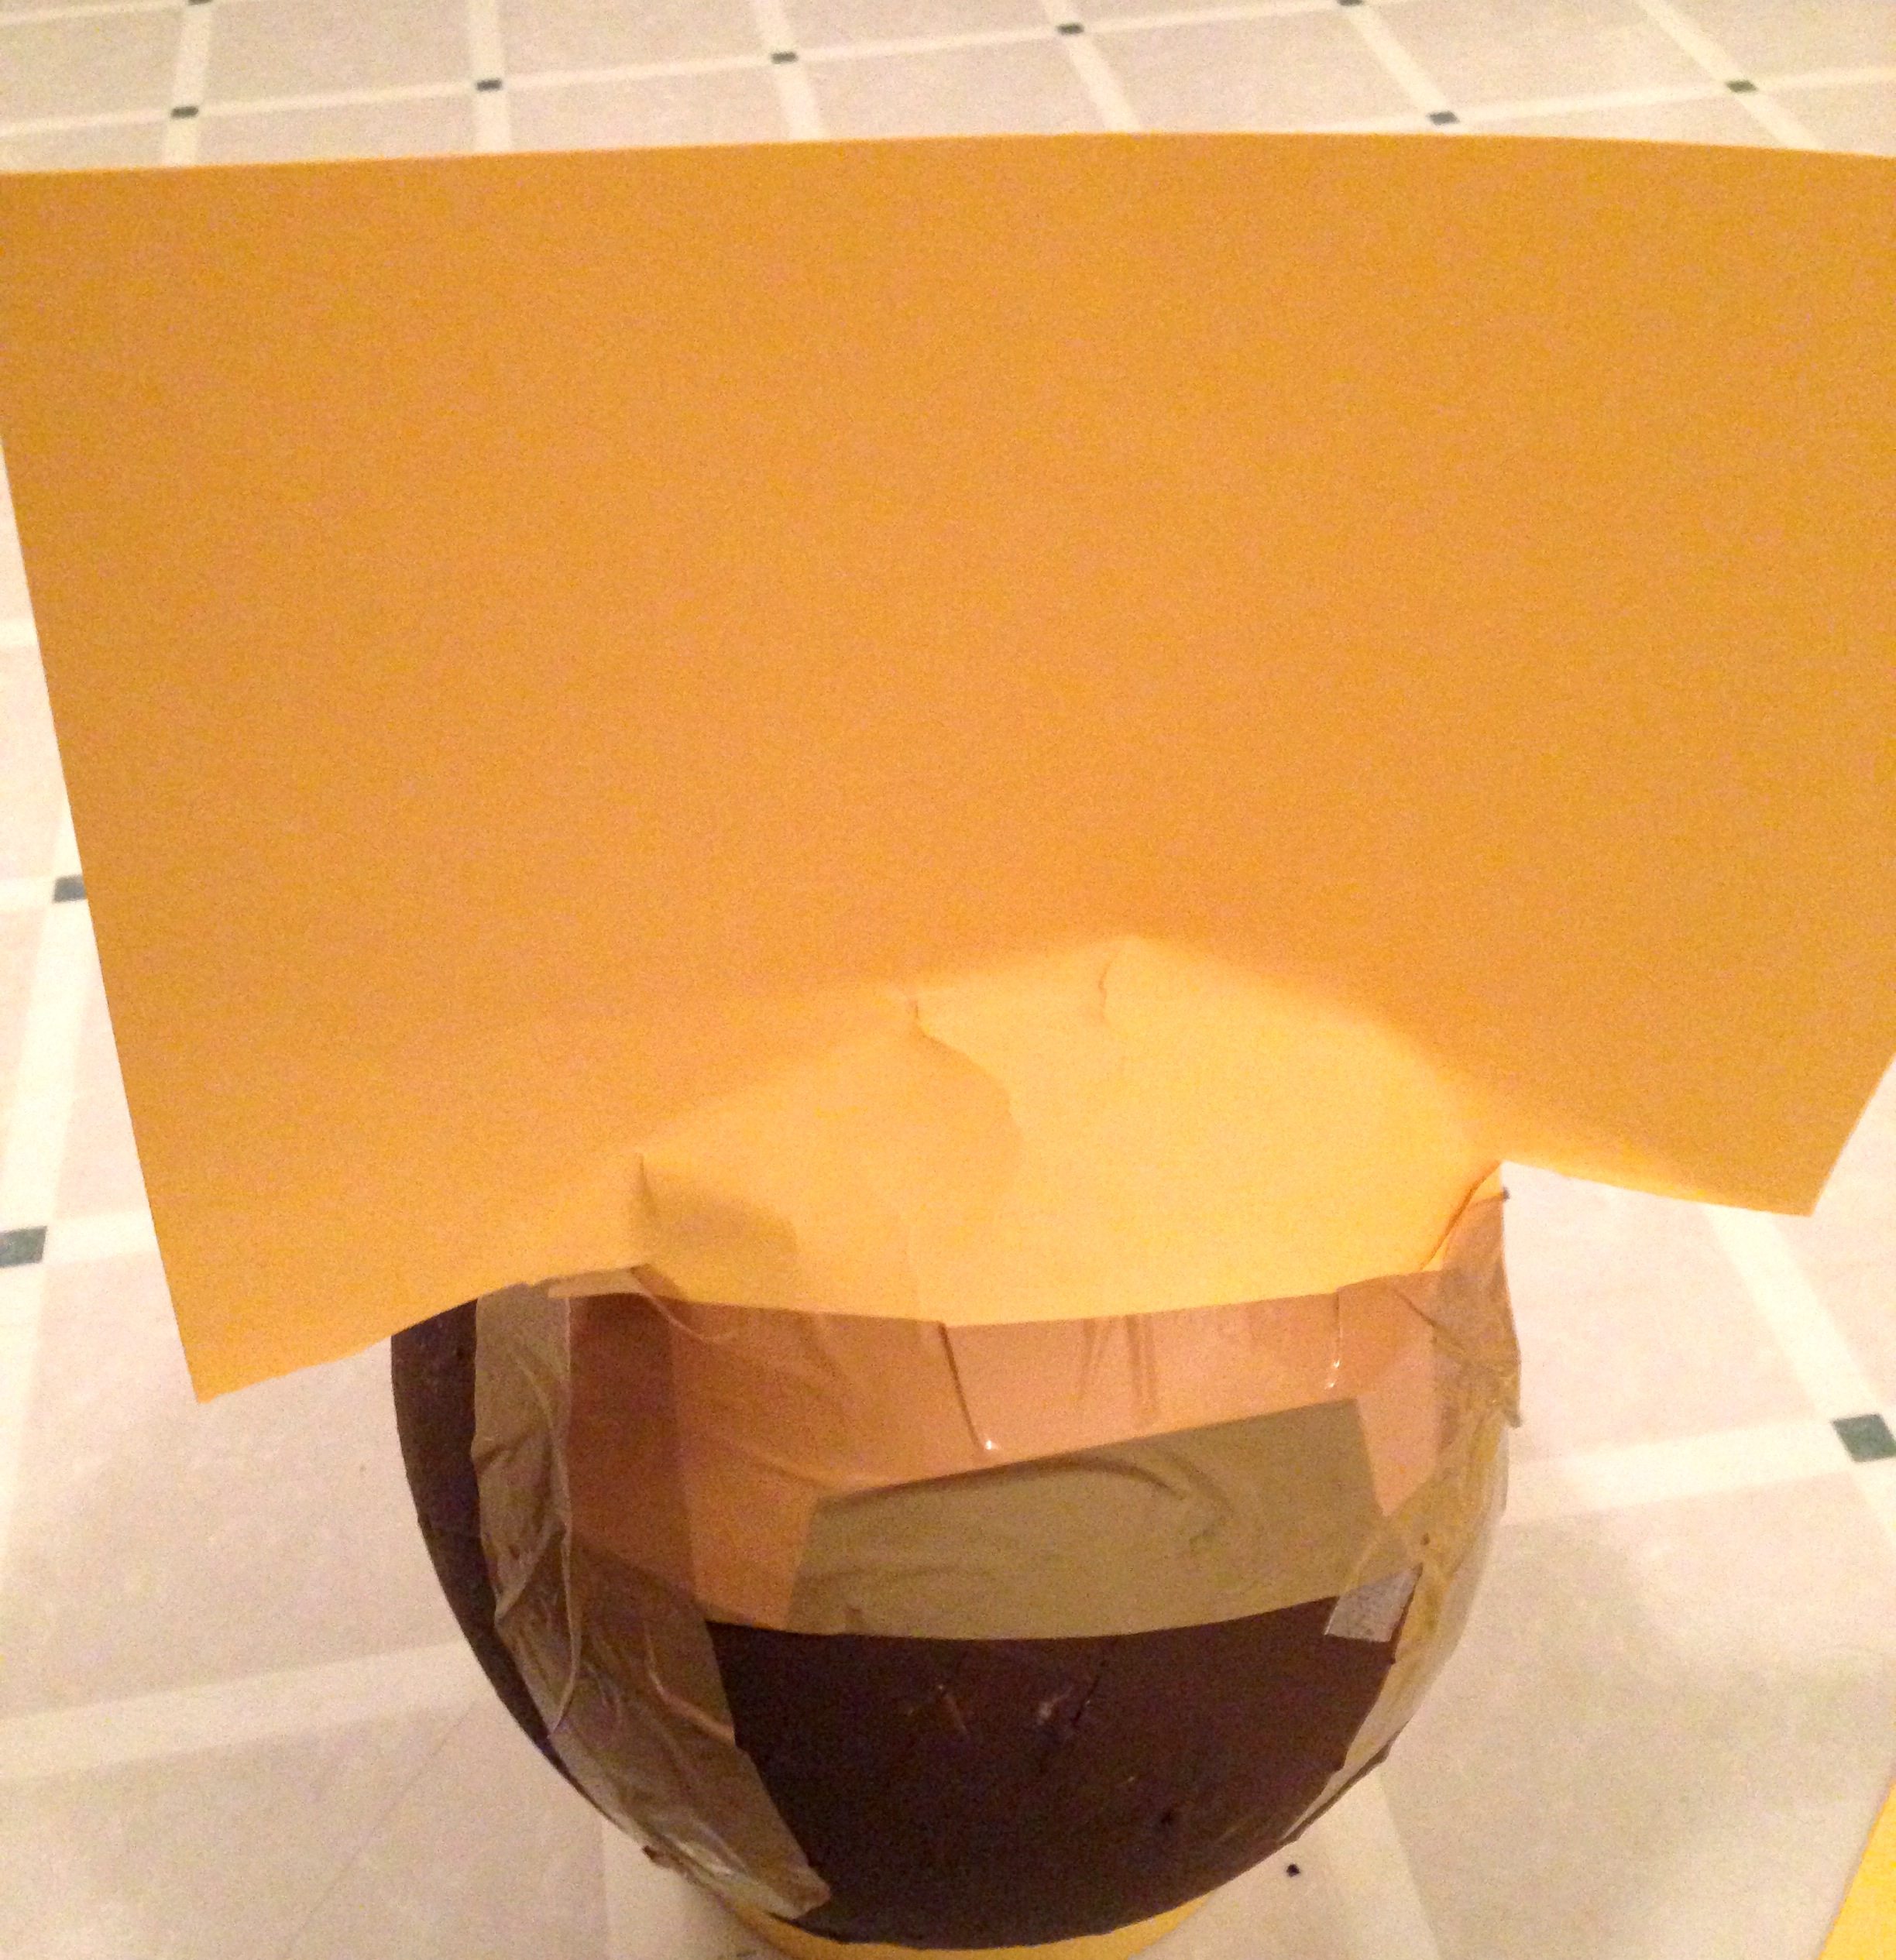
Some pics of the process… enjoy!

Hot glue some plastic creature on. Add some letters.
Mod Podge Magic
Mod Podge Magic
DIY Spell Books for Harry Potter Costume

Mermaid Party Pt. 1 – Octopus Balloon Animal Dance Party

Balloon Octopi
Balloon Octopi

What’s easier: 1) Blowing up a balloon or 2) making it into an octopus? I’ll give you a hint… one is impossible and one is pictured.

I am sure you’ve all seen a clown or street performer in your life whip out one of those balloon-animal-balloons, give it a little tug, and then inflate it in mere seconds using only the mouth as a tool. Easy, right? No. No it’s not.

If you’ve every tried this, you’re with me right now. If you’ve never tried it you’re probably thinking what my husband thought as he watched me turn red with effort and then fail repeatedly. He didn’t need to verbalize, his face told the story “Umm, what’s wrong with you?”

I just handed him the balloon.

The next day I was back at the store to buy the hand pump which I kinda feel should have a sign or something on it letting rookies like me know it’s not optional. I even asked the girl at the party store if she’s ever tried to blow one of these things up. She just laughed.

Ok, moving on. Once you have the pump and some balloons, it literally takes less than 2 mins to make a really cool looking octopus. Even less to make a sword. And I am sure that’s only the beginning. Google “easy balloon animals” and take your pick. Now that I have the pump, it’s a fun thing to have on hand when kids are around. I took the leftover balloons and the pump to the family Christmas… instant party. Even gramps was making creations.

Birthday Mermaid and her Octopus sidekick.

Octopus Balloon Animal Dance Party
Oh right, so I didn’t just start down this balloon making path randomly. My daughter’s birthday party was a mermaid party. We rented a park rec center and the entire thing was such an overload of crafty DIY projects that I just can’t write about it all at once. But one of the cheapest, easiest and biggest hits of the party was the Octopus Balloon Dance Party.

We blew up (with our actual mouths) a bunch of standard round balloons in shades of blues like the ocean and spread them about the floor. Then I made about eight of these large octopus balloon animals. We played the soundtrack from The Little Mermaid and the kids danced and pummeled each other with the octopus balloons. The balloons stood up remarkably well and the kids had a blast.

SUPPLIES FOR 1 OCTOPUS:
– 1 Balloon hand pump
– 1 12″ balloon for the body. I chose polka dots and tie dye.
– 2 5″ white balloons for the eyes
– 4 long balloons for legs
– Black Sharpie

There are lots of online tutorials if you google “octopus balloon animals.” I used this one: http://youtu.be/EFNqU2DPFkg

Trust me, don’t let this guys expert inflation skills fool you. Spend the 5 bucks for the frickin’ pump.

Octopus Balloon Animal
Eyelashes courtesy of my daughter.
Balloon Octopi
Balloon Octopi

Reindeer Food

Right now my house looks like a Michael’s craft store exploded all over it. It’s the bits and pieces that remain after a weekend of DIY mermaid birthday party compulsion and my poor burnt-out self cannot lift a finger to fix it right now. I also can’t write about it yet, it’s too fresh (and too much).

So how does that get us to reindeer food? And what even is reindeer food? Well, it’s pretty much just oats in a bag. With sprinkles…

My son’s school does this thing called The Gingerbread Shop where families bring in little things they’ve made and the school sets up a little “store” and each student gets to bring a couple dollars to shop. They buy the little crafts for 50 cents a piece. It’s sweet, my son came home last year with a little gift for each of us.

AND THIS STUFF IS ALL DUE TOMORROW. So yeah, oats in a bag. With sprinkles.

But as last minute and quick as this little project is, the kids (or at least my kids) like feeding the reindeers on Christmas Eve as much as they like leaving cookies for santa. So I figure the kids at school might like it to.

Reindeer Food
Reindeer Food

REINDEER FOOD
All you do is pour a bunch of oats in a bowl. Both whole oats and the steel cut work great. Have the kids dump in a bunch of Christmas sprinkles and even a little glitter (sure, Santa’s reindeers can eat glitter), and mix it all up. Then put it in a bag, tie it up, and put a label on it.

My husband questioned why I would add additional work with the label. But that’s the key part. That’s what turns oats in a bag magically into “Reindeer Food.”

Breakfast of Champions: Sprinkles, Glitter, Oats

Restaurant Challenge: El Caballo Wraps

El Caballo Wraps
El Caballo Wraps

I’ve seen this place many times but never thought to try it because A) the entire point of this restaurant challenge is to break our taqueria pattern and B) I was biased. Sorry, but it has the word “Wraps” in its name. It just reminds me of those chains that wrap things like rice, broccoli, and teriyaki chicken in a sun-dried tomato tortilla. See, now, that’s a wrap. But I was wrong. That’s not what this place has. This place has burritos and other delicious Mexican foods.

To be fair we didn’t pick this out of the bucket. The kids and I went with some friends a few weeks back at their recommendation. BUT we couldn’t count it towards the restaurant challenge until we went as a family. So tonight we returned and it was good for a second time, and we’ll most definitely be back. In fact, I think this might be my favorite Mexican food on the island.

Tortilla Soup & Papusa goodness

For me, it was all about the Chicken Tortilla Soup. On this cold night a few weeks before Christmas, this perfect bowl of soup paired with a pork papusa and a plastic bottle full of their amazing smokey hot sauce made for happiness. A few weeks back I tried a carnitas taco and some nachos. Both very tasty.

Here’s what the others thought…

Hoodie and Burrito... Just like his Dad in college.
Hoodie and Burrito… Just like his Dad in college.

Jack: Thumbs up for a bean and rice El Nino (kids) burrito, guacamole, chips. Learning experience: He thought he’d like black beans but tried them and has decided pinto is always the way to go. Agreed.

Elise: Bean (pinto) and Cheese El Nino Burrito and side of rice. She ate it all but said she didn’t like it. Standard mixed bag reaction. Remember Thanksgiving?

Mike: Burrito Al Pastor which he thought was just ok. I took a bite and liked it.

Bottom Line: We’ll return. Super friendly owner and staff, great food, DELISH Chicken Tortilla Soup.

El Caballo Wraps
1108 Lincoln Ave
(between Bay St & St Charles St)

It's cold out!
It’s cold out!

No pictures!
No pictures!

THANKSGIVING COOKING: KID COOKS RULE

Our Thanksgiving cook-off was a major success. So much so that we unanimously voted it the 1st annual Family Thanksgiving Cook-off (we need a better name). The food was great, the kids really helped with every dish, and nobody got hurt except me who managed about five minor burns while trafficking pies in and out of the oven. It’s probably a good thing that I never rounded up that brulee torch.

Elise was proud of herself for: chopping, whipping, stirring, sautéing, rolling, and peeling herself through 2 pies, sourdough-sausage stuffing, and green beans with bacon.

Jack came in strong with brining and roasting the turkey, peeling and sautéing glazed carrots, putting together a caesar salad and making whipped cream for the pies.

Of course there were needed breaks along the way… a game of kitchen wall-ball, a trip to the park, some make-believe dress up princess thing, a wrestling match… But they always came back to it. They didn’t want to miss having a hand in each dish. It was pretty cool.

As for a winner, well, in the end it was a tie until Jack made a good point that his sister pretty much voted against every one of her own dishes (pie and bacon aside). Let’s just say she had way more fun making the food than eating it.

The Feast!
The Feast!

Chopping, a pairing knife works well for little hands.
Sauteing veggies for stuffing

Cooking.  Everyone's into it!
Cooking. Everyone’s into it!

Can never be too dressed up.
Kitchen Wall Ball Break.

Apple and Pumpkin Pies
Whipping Cream
Whipping Cream
The Final Voting
The Final Voting

Thanksgiving: Paper Mache Turkey

Paper Mache Turkey
Paper Mache Turkey

We wanted to make a turkey centerpiece for our Holiday Cook Off. Now, see, I have issues. A project like this originates simply enough. Like “oh, let’s just cut out some hand-turkeys, color them and call it a day.” But then this weird part of me takes over. It starts with a “Hmm, how can I make it round? Paper mache and a balloon?” then it moves to “Oh, those tie dye leaves my neighbor made are pretty, that could work for the feathers” and then, well… then it’s on. Soon the kitchen is covered in glue and food coloring and there’s just no turning back.

This is what Fumbleweeds is about, winging it all the way through. So I’m going to level with you. The following instructions will likely make no sense. I am not entirely sure what I did to get this thing together.

All in all, it was an ok project that needs some fine-tuning. The kids had fun with the feathers, painting, and about 2 mins of the paper mache. It’s a multi-day endeavor with all the drying of things. And it’s messy. Paper Mache is very messy.

I like this twist though… we decided to write all of the things we’re thankful for on the turkey body over the next few days. Kinda like a Thanksgiving turkey cast.

Happy Thanksgiving!

Supplies
Supplies

Paper Mache Turkey
Supplies:
– Fall colored cardstock
– Unbleached cone coffee filters
– Food Coloring
– Glue
– Shredded newspaper
– a balloon
– Sharpie
– Scissors
– masking tape
– brown paint

Paper Mache Turkey Body

Turkey Body:
-Mix 3/4th Glue to 1/4 water in a pan
-Blow up a balloon
-dip strips of newspaper into glue mixture, pull each piece through fingers to get rid of extra glue, place onto the balloon
-Repeat this until the balloon is fully covered with at least 3 layers of paper/glue
-Tie string or dental floss around the tied part of the balloon and hang somewhere overnight. Put a towel or bowl under it for the dripping glue.
– Wipe up all the messy glue all over your kitchen before it dries and becomes a big pain in the butt (lesson learned)
– Once dry, paint the turkey body brown

Painting the body
Painting the body

Food Coloring Tie Dye Feathers

Feathers:
– Draw a feather on the coffee filter (see pic of supplies)
– Cut out feathers
– Put a little water in a shallow pan
– hold each feather over the pan and drip food coloring on it
– Then dip the feather into the water to “spread” the food coloring around
– Lay out flat to dry overnight

Food Coloring Fun
Food Coloring Fun

Turkey Head
Turkey Head

Turkey Head & Base
– Draw and cut out a turkey head from dark brown card stock
– Cut out a yellow beak and tape or glue dot onto the face
– draw eyes with a sharpie

– Cut out a red waddle and glue it to the neck

Back of the turkey
Back of the turkey

Assembly:
– Don’t cut off the knot of the balloon in the paper mache turkey body until the end. It gives structure so it doesn’t cave in
– Take a piece of card stock (I used yellow, brown would have been better) and cut into a semi-circle and mold around the largest part of the turkey body and tape. I used packing tape but I think masking tape would have been better and easer to cover over with paint at the end. Speaking of, paint over this taped up rear end with brown paint.
– Glue the “feathers” in a fan design onto the front covering all of the cardstock
– Cut off the tip of the balloon and either glue the turkey head over the hole OR, using strips of brown paper, attach it around the body of the turkey (see pic).
– Make a base by taking a long strip of card stock, make it into a circle and tape it together to make a stand

Our Turkey Guy
Our Turkey Guy
Turkey Love
Turkey Love

Thanksgiving Cooking: Kids + Knives + Fire. This will end well.

Who out there watched Masterchef Junior? Seriously, if you didn’t you should. And if you did, you are probably thinking what underachievers your own kids are at this point. I kid, I kid… but these were some pretty amazing 9-13 year old kids wielding some serious cooking skills and restaurant quality dishes.

This is the first “show” we watched as a family. Meaning, not an on-demand age appropriate cartoon that the kids zone out on as we quickly move around the house getting tasks done. No, I mean a show we actually sat down together to watch, stayed glued to throughout, and discussed together. It was the most interactive TV that exists.

I say this because it’s left a lasting, ACTIONABLE impression on my kids. My son, a traditionally “focused” eater, has started asking to try new things. Things like roe at sushi and stuff with herbs on it. Trust me, this is BIG. And both kids have been popping into the kitchen more, asking to help. I think it really empowered them to see kids near their own age doing stuff we typically associate with adults (and kicking butt at it.)

So this Thanksgiving, inspired by the show, the kids decided they want to make our own cooking contest.

Thanksgiving Cooking Contest 2013
We’ve split into two teams, secret recipes are in the works. We will make a full traditional turkey dinner with an abnormal pie-to-people ratio. Kids will chop, sauté, brine, and roast. There might even be a blow torch in the mix.

Team 1: Mike & Jack
Team 2: Kristin & Ellie

Stay tuned…

Let the games begin!

Adventuring: Fruitvale Dia De Los Muertos Festival

Sugar Skulls
Sugar Skulls

Today’s adventure was a local one as we headed over the bridge to the Dia De Los Muertos Festival in the Fruitvale neighborhood of Oakland.

At the risk of making myself look shallow, I will admit that I am one of those fans of Dia De Los Muertos that loves it mostly for aesthetic reasons. I love the colors, the elaborate skeleton face paint, the look of the alters, the sugar skulls, the witty paper mache dolls, and the bright paper banners. It’s pure beauty.

But maybe because I am getting older, or maybe it’s the mother in me, I find myself increasingly enamored with the sentiment of it all. The idea that for a few nights a year, our deceased loved ones visit us and that we welcome them with alters in their honor, dripping in celebration rather than sadness, to enjoy a visit together. It’s a lovely idea.

It gets better… on Nov 2, the celebration is taken to the cemetery where families hang out with their returning loved ones cleaning their tombs, eating, drinking, playing cards and watching TV all night before sending them off with a song and returning home themselves saturated with love, community, memories and, well… some booze.

Dia De Los Muertos Festival at Fruitvale

Fruitvale Love
Fruitvale Love

Our adventure today was spent wandering the Dia De Los Muertos Festival soaking in great weather and a super fun family-friendly festival right in our backyard. We all gave it thumbs up… Jack and Elise loved the giant slide and their mango shaved ice, Mike enjoyed a taco or three, and I pretty much loved all of it. My favorite favorites being the alters, the Aztec dancers, the live music, my mangonada, and (of course) the beauty of it all…

The kids running this booth were amazing. They were so proud of their art work, and for good reason. I love the idea of using pans as the canvas for these calaveras paintings.
The St Jarlath School kids made these amazing sugar skulls and pasta pictures as well.
Hamming it up.
Never misses a photo op.
Giant Slide.
Giant Slide. nuff said.
Love and Mango... and a rad tiger shirt.
Love and Mango… and a rad tiger shirt.
Mangonada! SO good.
Mangonada! Mango, Ice, Chamoy… spicy and yum.
Sad truth is that Oakland isn't always this festive.
Sad truth about Oakland.

On the way home we talked about the holiday in more detail. And it got Jack thinking about Kitty, our cat who passed away a little less than a year ago. Jack still misses Kitty a lot. So we decided to celebrate Kitty on this Dia De Los Muertos with an alter built on the backyard grass where kitty loved to stretch out on a sunny day. We pulled together some of his favorite things: some tomatoes & strawberries, comfy blanket, the memorial stone we made when he died, some candles, and our new sugar skulls. Jack carefully placed each of these items on the grass and then we sat and talked about kitty for a few. There were some tears, but we also laughed at how kitty loved to steal and eat our fruit, and what a fun and sweet cat he was and how when he ran his saggy tummy swayed back and forth. Short but sweet, our Dia De Los Muertos memorial ended in laughs and good thoughts.

Kitty Alter - yes, he really did love fruit.
Kitty Alter – yes, he really did love fruit.

Halloween Pt. 2: Window Silhouettes

Somehow I’ve overcommitted myself again to none other than, well… myself. Seriously, what is my problem? This is a habit. I worked all day, commuted home and then proceeded to make this list that I started at 6:30PM tonight:

List of unnecessaries
List of Unnecessaries

And now it’s 11:30, I’ve already crossed off “blog” so I guess I should finish it. And most everything else got done in some rushed, half-assed way. Except, as you can see, homework. That didn’t get done at all. Way to fumble on the important stuff!

Not much good came out of tonight so I’m blogging about last night. But before that, I do have a tip for parents who need a super quick idea for a preschool Halloween party potluck:

Halloween Cheese Plate
– Pre-sliced Cheese
– Halloween Cookie Cutters
– Crackers

Cut Halloween shapes out of the slices of cheese with the cookie cutters. Layer on a Halloween tray with some crackers. done. Oh, save the scraps for homemade mac ‘n cheese.

Yeah, so by “cheese plate” on my list I sadly didn’t mean a nice display of a goat, cow, and sheep’s milk medley with figs and pear compote. No, I meant Cheddar pumpkins and Monterey Jack Ghosts. Classy. Anyhow, this isn’t about tonight’s subpar performance, this is about last night…

Halloween Window Silhouettes

Our Halloween House
Our Halloween House

Every year I get really into making silhouette cutouts for the windows. On our dinky little craftsman we have two front windows that beg for something Halloween-y. And so I buy some black poster board paper, bust out my clear packing tape and scissors, and get to work.

A simple Google search for Halloween Silhouettes generates a ton of ideas and usually gets me inspired. I then decide what I want to do, draw it out with pencil on the poster board, and start cutting. Scissors work well for most of the cutting, in fact you can do it all this way, but an X-Acto knife for the cutouts and fine details does give a cleaner look. Once complete, I tape them up with the clearest packing tape I can find. This way the tape on the window doesn’t show as much.

I don’t think the photography does these justice, they look much better lit up in person. I love this project because it’s totally free-form, it’s paper art which I love, and it can be as simple as a few bats and gravestones, or as complicated as entire spooky scenes.

Halloween 2013:

Halloween 2013
Halloween 2013

Halloween 2011

Halloween 2011
Halloween 2011

Halloween 2008
My favorite…

Halloween 2008
Halloween 2008

Supplies:

Simple supplies
Simple supplies

Halloween: Pt 1

Trick or Treat
Trick or Treat

Remember Halloween when you were a kid? How good was Halloween. Throwing together some funky diy costume, grabbing a pillowcase for your candy haul, running around with the neighborhood crew until well after dark… adult-free. Then coming home, dumping out your candy piles, trading with your brother while your mom checked for rumored razors. Good times. I loved it. LOVED it.

I was feeling nostalgic about it today while at our school’s Fall Halloween Carnival. I mean, while we live mere miles from a major metropolis, Halloween is still much the same all these years later. Old-school style carnivals, pumpkin patches, trick or treating, candy… it’s still going strong.

Halloween is also obviously a really perfect holiday for making stuff. This week I’ll try to post some of our favorites, starting with stuff we’ve made in the past.

Mummy Cake
Ok, this isn’t from the past, this is from today. My daughter and I made it for the carnival cake walk. We totally cut corners because she’s four and I work full time. So I got a box of Red Velvet (mwahaha, blood) Cake mix, a jar of vanilla frosting, and was all set to bust out some mummy wraps with a piping bag when I stumbled upon a mummy cupcake kit at Target. White sour gummy strips! Like striking gold.

MMM, delicious mummies.

All we did was cut a top of a cardboard box and wrap it in foil for the tray. We then baked the cake in a 7″ Corningware dish so that it would be tall. Then frosted it with the white frosting, leaving the eye area bare. My daughter plopped some sugar eyes on, and we wrapped it like a mummy with those gummy strips. So easy.

Candy Eyes
Candy Eyes

frosted, ready to wrap.

Crafts of Halloween Past
A few other Halloween things from years past…

Mummy Dogs
These are so easy and kinda rad so I make them every year. Use full hotdogs, or cut them in half, or get lil smokies, they all work. I’ve wrapped them in strips of Trader Joe’s pizza dough and I’ve tried breadstick or other pre-made doughs. I like the look of the pizza dough best but I recommend brushing them with some melted butter before baking. So pick your dough, cut it in strips, wrap the dogs, bake at 375-ish until the dough looks done. Dot mustard or ketchup for eyes.

MMM, more mummies
MMM, more mummies

Alien Cupcakes
These were from the Hello Cupcakes book. They were hard. Don’t start them at 10PM.
http://blog.hellocupcakebook.com/2009/10/21/more-halloween-cupcakes.aspx

MMM, delicious aliens.

Dalmation (Cow?) Costume
White onsie, black fabric paint… all planned around a cute hat she already had. She was a cute little Cowmation.

Puppy? Cow?
Puppy? Cow?